Menus are used to create contextual menus on 3D equipment.
A menu is displayed at the mouse location when the user Right clicks on the equipment.
The first entry of a menu will dictate the behavior when the user Left clicks on the equipment.
From the Project Explorer Panel use Right click over the entry Menu and select New.
A new Menu is created with a default name of 'Menu1' where the number increments for each new Menu and you are able to rename the Menu at this stage.
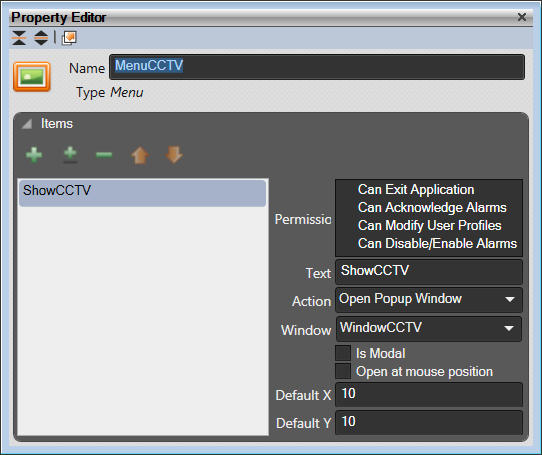
If the Property Editor is not displayed, click on Ribbon > Home > Property Editor to open the Property Editor. When the Menu is selected its properties will be displayed in the Property Editor Window allowing you to make changes.
Use Right click on a Menu or a group of Menus and select Delete from the menu. You will be asked to confirm the deletion.
Use Right click on a Menu and select Rename from the menu. You can enter the new name.
Name: Name of the Menu. This name must be unique in the list of Menus.
Items:
Add a new Menu item (+): Add a new menu item. Defaults to 'Text'
Add a new separator (±): Inserts a separator line in the menu
Delete selected menu item (-): Delete the selected menu item
Move up selected menu item (⇧): Move the selected item up
Move down selected menu item (⇩): Move the selected item down
Permissions: list of permissions required to action the button. Any mouse event on the Menu will be ignored unless the current user has all the selected permissions enabled.
See "Users"panel to define new permissions or edit the current ones.
Text: The text to use when the user Right clicks over the object that has this menu attached to it.
Action: The properties available depends upon the Action selected. See "Actions"
Event Log: Configure an Event Log entry for this control. See "Event Logs"